


Offensive Security Tool: DroneSploit || This CLI framework is based on sploitkit and is an attempt to gather hacking techniques and exploits especially focused on drone hacking. For the ease of use, the interface has a layout that looks like Metasploit.
- New tool offers Metasploit-like framework for hacking into drones, The Daily Swig
- Dronesploit, a pentesting console framework dedicated to drones, Hakin9
Setup
This project is available on PyPi and can be simply installed using Pip:
pip3 install dronesploit
Basics
Interface

Modules
This example shows an example of module for DroneSploit aimed to change the password or the SSID of a particular model of drone.

Setup
This project is available on PyPi and can be simply installed using Pip:
pip3 install dronesploit
1. Startup
$ python3 main.py --help
usage: ./main.py [--dev] [-h] [-v]

Main

optional arguments:
  --dev          development mode (default: False)

extra arguments:
  -h, --help     show this help message and exit
  -v, --verbose  verbose mode (default: False)
The console is started using the launcher main.py. It may ask for sudo rights as it must have the permission for setting WiFi interfaces.
$ python3 main.py
[sudo] password for user:

[...]
At startup, a banner is shown and a summary of the available modules is shown.
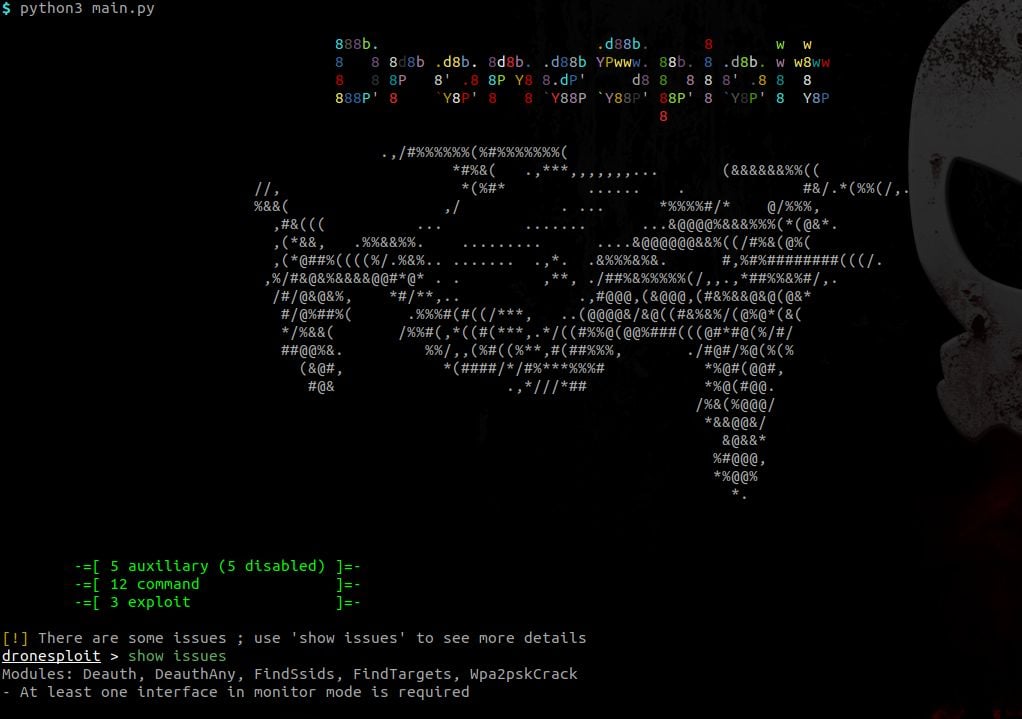
Some requirements can be unsatisfied at startup like in the picture above. The command show issues allows to identify how this can be fixed.
2.1 From the root console
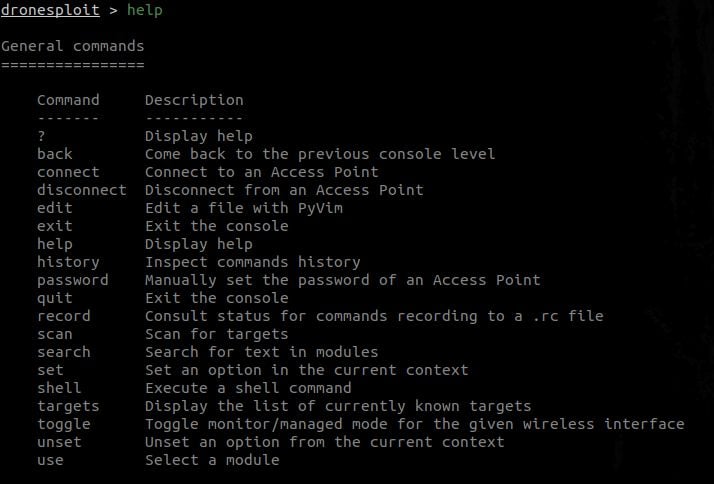
dronesploit > help
[...]
This will display multiple sections in function of the context ;
- General commands are always displayed. Example: Getting help in DroneSploit – General commands
- Level-specific commands are displayed according to the current console. Example: Getting help in DroneSploit – Specific commands:
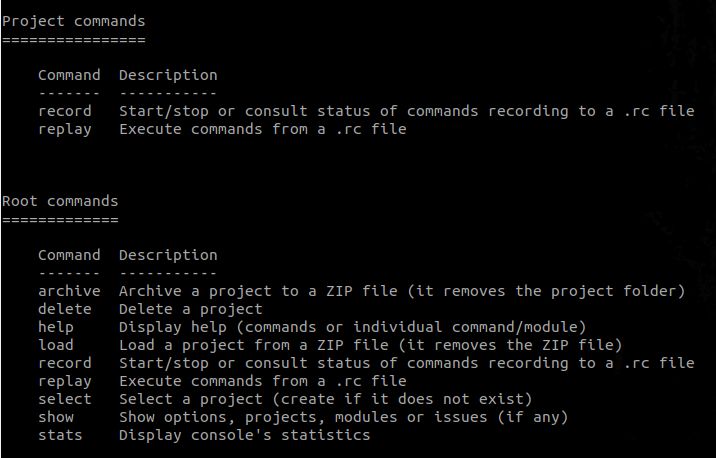
2.2 From the project console
dronesploit > select test
dronesploit[test] > help
[...]
Now being into the context of a project, we now see the general commands again but with the project commands as the section for level-specific commands; Example: Getting help in DroneSploit – Project-level commands:

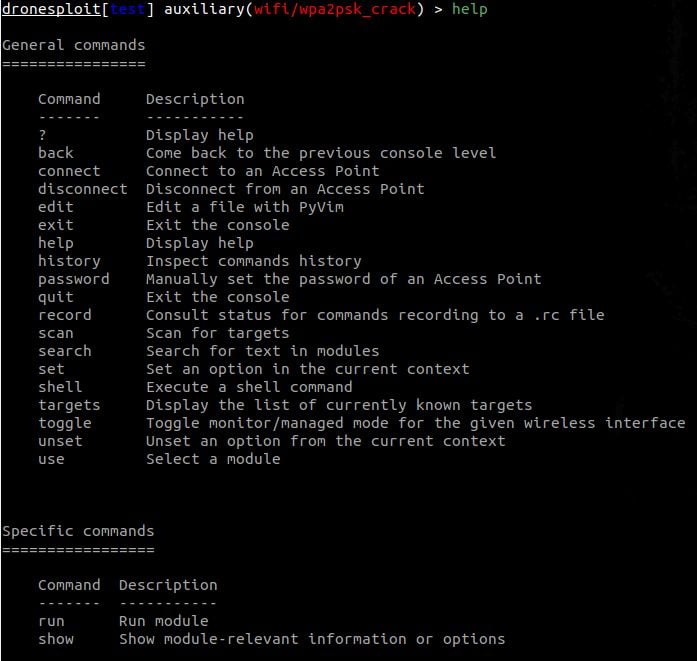
2.3 From the module console
dronesploit[test] > use auxiliary/wifi/deauth
dronesploit[test] auxiliary(wifi/deauth) > help
[...]
Now being into the context of a module, we now see the general commands again but with the module commands as the section for level-specific commands; Example: Getting help in DroneSploit – Module-level commands:
3. Listing available modules
This can be achieved by executing the following command:
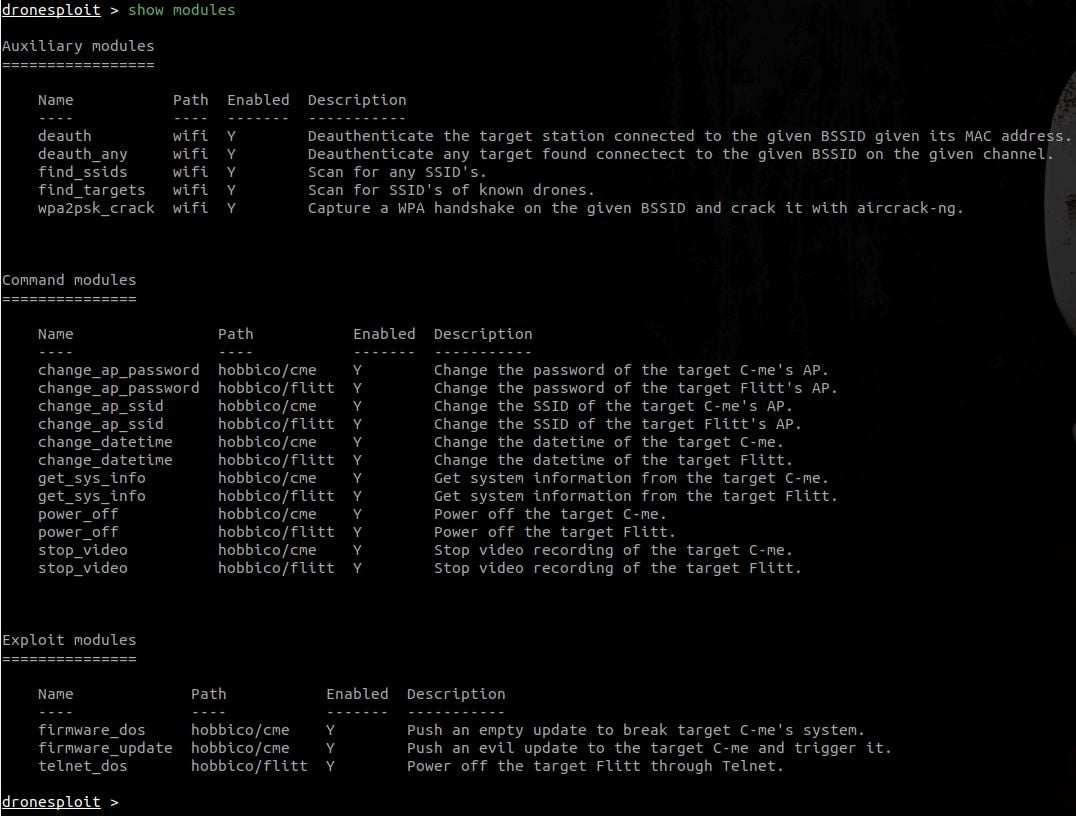
In the screenshot above, one can see two modules that are disabled, like shown at startup.
4. Enabling the WiFi monitor mode
The toggle command allows to toggle the WiFi mode for an interface. It autocompletes through the list of WiFi interfaces present on the system.

When executed, it switches between the managed and monitor modes

5. Scanning for targets
The scan command allows to quickly scan for targets (and requires a WiFi interface in monitor mode).

The targets command then allows to list the discovered targets and their characteristics.
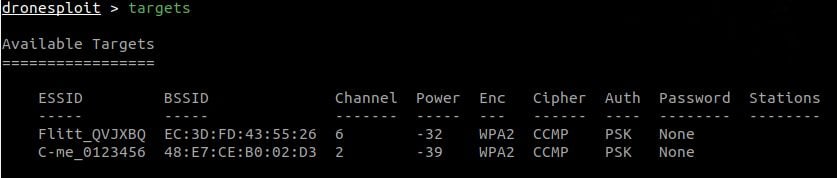
Targets are valid during a period of 5 minutes, meaning that they will still be displayed after this period, but when using the scan command again, the list will be updated (and targets that are not in the vicinity anymore will disappear).
6. Breaking into a target
Now that we have a target, we can start an attack. For this purpose, we start the appropriate attack module. Note that, in the example hereafter, the ESSID and INTERFACE options are automatically filled in with the current information.

The attack succeeded and the password is then known in the targets list.

Sadly, lots of light commercial drones have the same default password ; the password command allows to fill in the password without having to run an attack.
![]()
7. Connecting to the target
At this point, we have a password for a target, we can know connect to it using the connectcommand.
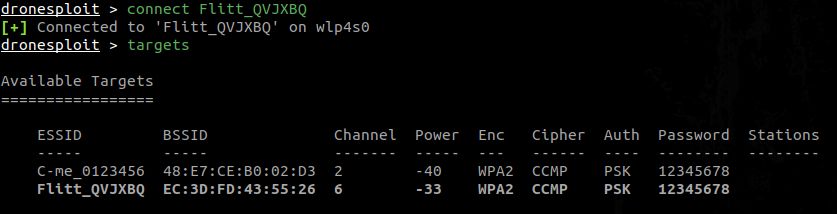
Like shown in the screenshot above, the targets list has now a row highlighted in bold to show that we are connected to this target.
We can also connect to another target.

In the case herebefore, we call a module for which the required model of target can not be found as connected to the attack machine, therefore raising a warning. If we show the options for this module, we get several required values that are not filled in.

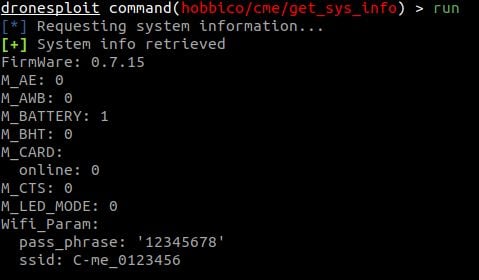
8. Executing a module
We can now use a module for the connected drone using the use command.

In this example, one can see that the value for the TARGET option is automatically filled in. The module is then directly ready to run.
Finally, we can run the module by using the run command.


What’s up, yup this piece of writing is really good and I have learned lot of things from it regarding blogging.
thanks.
I blog quite often and I genuinely thank you for your information. This article has truly peaked my interest.
I will book mark your website and keep checking for new information about once a week.
I opted in for your RSS feed too.
Hello.This post was extremely interesting, especially because I was searching for thoughts on this matter last Thursday.