


how to speed up your Windows 10 operating system Windows 10 is the default operating system installed on most devices these days; It was originally designed to be the most user-friendly, effective and fast OS from Microsoft – and so far, it is performing well.
But there are a lot of things that can slow down your computer’s performance over time. If you’ve been using your PC for a stretch and noticed that it’s slowing down and more prone to lag when you can’t afford it to, or if you’ve bought a used PC from someone else and find that it’s too slow for what you need to do, it could be time to speed up your PC.
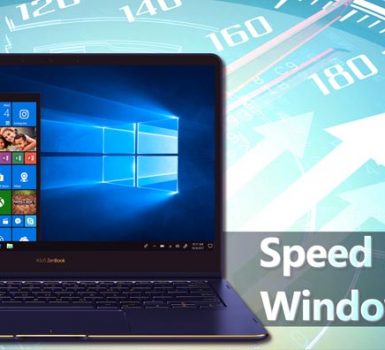
Here are the top 10 tips how to speed up your Windows 10 operating system and improve overall PC performance.
Why Use Windows 10?
A lot of users are tempted to uninstall the operating system entirely once there’s any sign of an issue. This isn’t always necessary: There are a lot of things that can slow down your computer that isn’t directly related to the operating system, and doesn’t need a re-install to fix – just a few minutes.
This article addresses 10 of the most common fixes, tips and techniques you can use to speed up your operating system. But first, let’s talk about the reasons why you should continue to use Windows 10 above other recommended operating systems like Linux, Mac or earlier versions of Windows.
- It’s one of the best operating systems Microsoft has to offer.
Microsoft 10 is the culmination of several years of user feedback and design, and from we’re standing now, it’s one of the best operating systems that Microsoft can offer – with 24-hour technical support from the main team if you should ever need it for anything you can’t fix yourself.
- It remains up-to-date against viruses and spyware.
Windows 10 is set to automatically protect itself against the latest forms of viruses and spyware that hit the internet, and you’ve got their guarantee that you’re well-guarded against both.
- It’s still the primary choice operating system for programmers, gamers and other professionals.
If you’re a gamer, programmer or other professional who has specific needs for their PC, Windows still manages to meet these needs best in the majority of cases – including yours.
- It’s one of the most user-friendly operating systems, give or take a few things.
Windows 10 was designed to be user-friendly – and it still remains one of the most user-friendly operating systems compared to many of the other options available on the market.
- It’s one of the easiest operating systems to repair yourself.
When something goes wrong with your Windows 10 system, it’s one of the easiest things to fix yourself – and there’s usually no need to call in external help.
- Clean Up Your History
Your computer’s history can be one of the main factors slowing down your system, and if your PC is acting strange or slowing down (and you’ve been using it for a few weeks or months without changing much), start off by clearing your internet history. Remember to clear it across several different browser (e.g. Internet Explorer, Chrome and Firefox) if you have several installed at the same time.
If you don’t know where to find your internet history, it’s usually under Settings > History or just History. You’d be surprised just how much it can slow you down!
- Remove Unnecessary Software
Software that you haven’t used in a while can take up a lot of space on your hard drive, and it can really slow down the performance of your system. If there’s any software that you haven’t used in more than a month, uninstall the software – and browse through Program Files to see if the software left any saved files (or residual folders) behind after it was uninstalled.
Sometimes just this simple technique can take a few gigs off your drive and help to better performance.
- The Performance Troubleshooter
The Performance Troubleshooter is a new tool that comes with Windows 10, and it’s a quick way to speed up your PC without having to do much. All that you have to do is run the performance troubleshooting tool, and the computer does the rest for you. At the end of the scan, it will find out what’s affecting your current PC performance and ask if you’d like to fix any of the issues – and it’s a great help when you’re trying to figure out what’s wrong and you’ve tried other methods without it working.
- Turn Off Visual Effects
Visual effects are aesthetically pleasing – that’s why they’re there in the first place. But a lot of people don’t realize just how much processing power these visual effects can eat while they’re in progress. If you notice that your PC is slowing down or taking too long to start up – or if programs and software are starting to experience some serious lag – turn off all visual effects, reboot and try again: It’s likely that your performance will be greatly improved on startup.
- Close Active Programs
Do you have any idea just how many programs and processor your computer is running at any one point in time? Likely not. The old shortcut Ctrl+Alt+Del now gives you access to a more detailed version of the Task Manager, where you can see all active processes – and end those that aren’t useful. Also check your startup menu to see what’s starting up with your operating system that you don’t really need. Remove what you don’t, and watch the system’s speed soar again.
- Adjust the Power Settings
Windows 10 is designed to automatically start up in Power Saving mode; this is great, but it might not meet your needs – and some aspects of power saving mode, while saving power, can chew up your system’s resources. You can usually find the power settings under the Control Panel. Adjust to something less resource-heavy and you’ll generally find that your system performs a lot better with little to no effect on power usage.
- Disk Cleanup Tool
The good old Disk Cleanup Tool still makes up part of Windows 10, and if you’re experiencing any loss of system speed, it’s always a good idea to run the cleanup tool and get rid of any files that might be slowing your system even further. It’s normal for these junk files to accumulate over time, and this is another technique that can help you to free up a lot of space and resources on your system all at once.
- Turn On Fast Startup
Windows 10 has been optimized to be the fastest and most effective operating system Microsoft has to offer you so far, and they’ve added a few settings to the system that make it quick and easy to speed up your PC when you’re in need of a quick fix.
PC lag isn’t just limited to running software, it can also be related to your startup – and if your startup is taking too long, the first step that you should take is to turn on Fast Startup. Again, you can find this under your Control Panel. From there, go to Shutdown Settings.
Fast startup speeds up the rate of which your PC wakes itself up, and combined with removing all the unnecessary programs from your startup menu, it can greatly speed up your system’s overall performance.
- Set Virtual Memory
Hardware memory isn’t the only thing that’s keeping your PC alive. It also makes use of virtual memory, and the processes on your system might be taking up too much of it for your PC to run comfortably when you start to experience any lag. If this is the case, removing all unnecessary processes, programs and files from your computer should be enough to do the trick – and free up excess virtual memory.
If this doesn’t work, you can set the amount of virtual memory the PC allocates for use; if you experience any lag, play around with the settings and increase it if the resource-use of your PC isn’t matching up with the virtual memory that it needs to do it.
If this still doesn’t work, try combining it with some of the other tips previously mentioned in this article and see if your PC performance improves.
- Adjust RAM
If you’ve done everything on this list and it still hasn’t made much of a difference to your PC’s performance, the next best thing you can do is a hardware fix: You might have to increase the amount of RAM in your PC to keep up with the resource needs of your PC. This is easy to do yourself, and it usually just involves opening up your PC’s tower and snapping the memory in place – there are plenty of guides on how to do this on YouTube if you’ve never done this yourself before.
It’s best if you combine several of the methods on this list with one another when you adjust your RAM; all the combined methods in this article make for a guaranteed way to speed up your Windows 10 system and improve its overall performance.


